
StationeryĀĀ 2 Let me re-emphasize to avoid confusion....this tutorial is for users of Outlook Express 5 or higher. If you haven't upgraded from an older version, I would recommend that you do, whether you want to make stationery or not.
To view these pages with the font they were designed with, you may need to download and install the "Technical font .zip file".
Creating Stationery for use with Outlook Express 5
This tutorial is designed to help you learn to make your own customized stationery for Outlook Express. This is a much simpler process than you might imagine. A Stationery wizard will actually do most of the work in this exercise.
The purpose of the illustrations and explanations are to familiarize you with the steps, and to make this an even easier accomplishment...
Open your Outlook Express program, and click on Message then select "New Message Using", then Stationery.
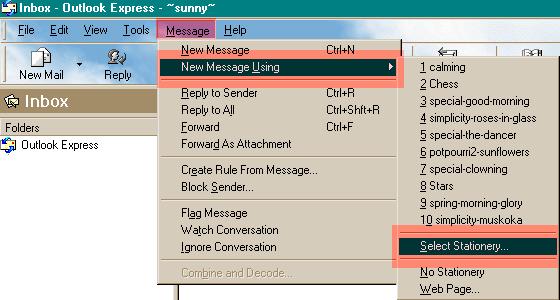
When the Stationery window opens, Click on "Create New" as shown below. This will launch the Stationery wizard.
illus. [1]
If you wish to create a simple tiled background, that can be done by simply tiling an image you've selected from the standard process shown in the first tutorial of this series, "Create Rich Text E-Mail". I would recommend using this wizard for making bordered stationery.
illus. [2]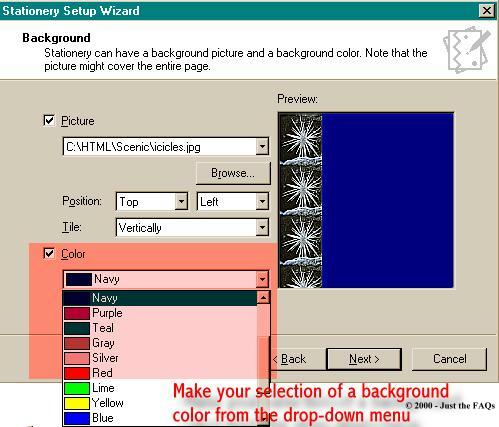
The Wizard will walk you through the steps to create your own stationery. After the opening window shows, click Next. This is the window that will appear.
Click Next to move on to the next window.
illus. [3]
Now, you need to decide HOW you want this image to behave. If you choose to tile it (make it repeat), when you click to open the Tile option, make your choice from there. This one was tiled vertically, on the left side. Once you have your choices to suit you, click Next to go to the next option, Fonts.
illus. [4]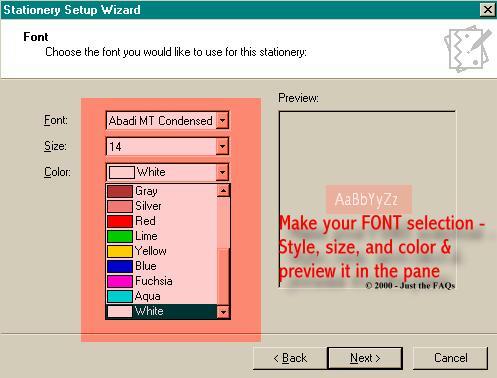
Choose your font from your list of fonts. They are made available to you by clicking on the down arrow in the font selection area. You may also make your choices of size and color here. You can preview the fonts as you select them in the preview pane.
Once you've made your choices, click Next to move to the next step.
illus. [5]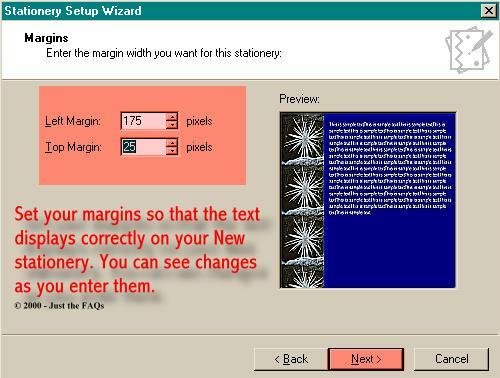
You're ready to set the margins for this stationery now. Because this stationery has a bordered image, you wouldn't want the text you're planning to add to be placed over the image. Clicking on the up option in the Left Margin will steadily increase the margin and move the sample text. Just continue clicking either up or down till you get the text placed where you want it. Do the same for the top margin option.
When this stationery is saved, not just the image you've created will be saved. Included in it will be the preformatting that you're doing right now.....your font choices, and your margins. All you'll have to do is select it from your list of stationery, and it will be ready to use.
If you're happy with what you've created, click Next, and you'll be taken to a window where you can name your Stationery. The .htm/.html extension is added automatically for you.
Once you've named it, click Finish, and the window below will appear.
illus. [6]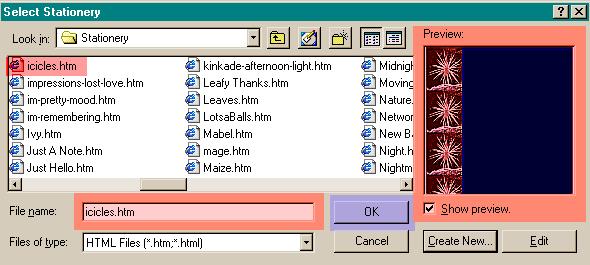
From here, you can select your new, custom-made stationery to use...as many times as you wish.
Introduction - Creative E-Mail
Part One - Create a Rich Text E-Mail
Part Two -Adding Sounds
Part Three -Using Stationery
Part Five -Adding a Scroll Effect
® ®2000, 2001, 2002 - Sunny's StuffÖ - All Rights Reserved DISCLAIMER:
This tutorial and graphics may not be reproduced in part or whole without express permission of Sunny's StuffÖ
I do not claim ownership of the ideas presented here, but the composition of the words, the design of these pages, and the presentation of the material offered is mine.